Inflatable kayaks are becoming more and more popular because they are fun and easy to transport thanks to their small size.
Today, we are going to discuss how to inflate a kayak safely. I already wrote an article on inflating dinghies, but that process is a bit different.
Now without further ado, let’s take a look at how to pump up your inflatable kayak properly.
Contents
Step-by-step guide on how to inflate a kayak
Here are the exact steps you should take to inflate an inflatable kayak.
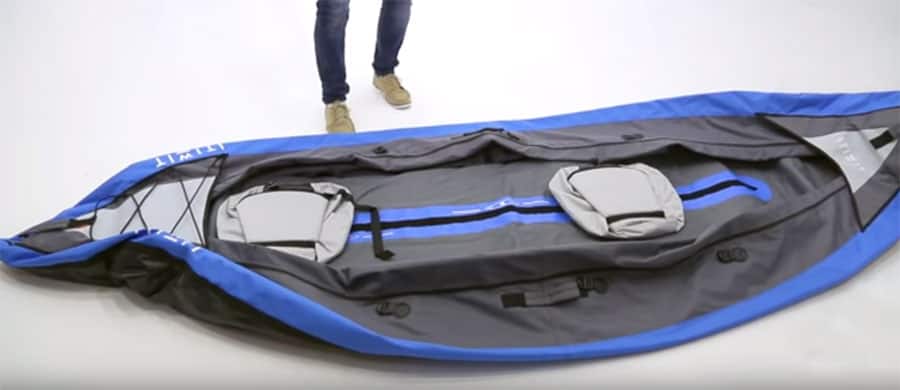
Unfold and lay the kayak out
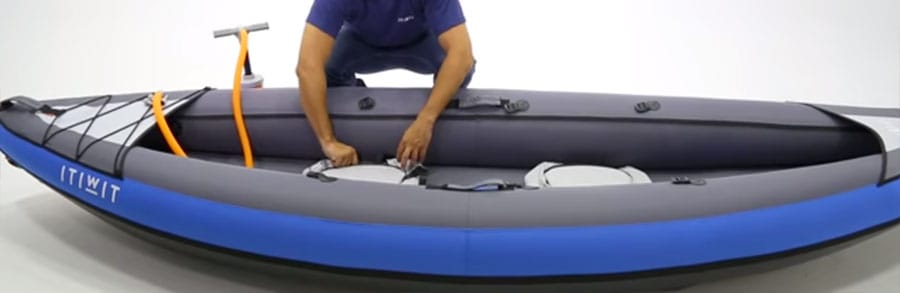
First, you need to take the kayak out of its carrying bag, and unfold it nicely. It should lay out flat like this.
Inflate the floor chamber
A typical inflatable kayak will usually have a total of three air chambers: the floor and the 2 side walls.
Some lower quality kayaks only have 2 chambers: a floor and a single connected wall tube.
You need to keep in mind that you should always inflate the air chamber that is located on the bottom part of the kayak first. This is the floor air chamber or air tube. It is important to pump the floor first, because it sets the base around which the walls of the kayak will be inflated.
Locating the air valve, you will find that it is either a Boston valve or a Halkey Roberts valve. Please check the linked articles if you want to learn how they work.
Now put the correct valve adapter onto your air pump, and inflate the floor chamber fully.
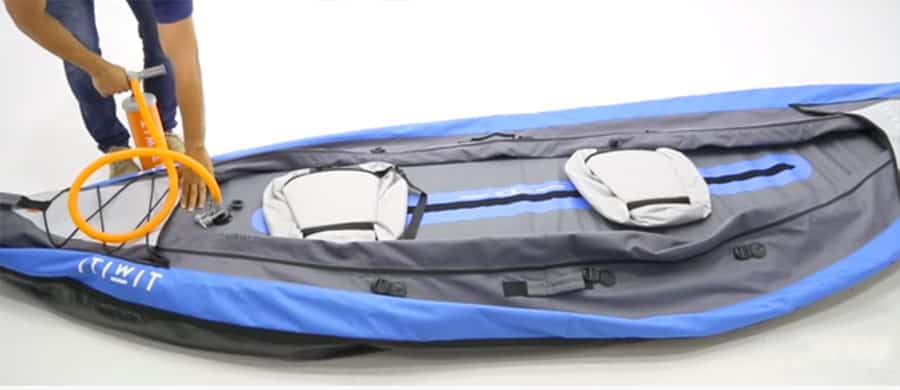
Again, do not inflate the other air chambers first, because that would make it difficult to inflate the other tubes properly.
Once the floor chamber is pumped, you can detach your pump and close the air valve.
Fill each wall chamber to 60-70%
Next, you will inflate the walls of the kayak. When you get a new kayak, it’s a good idea to partially inflate each wall to 60-70%, so they can set.
If you fully inflate one side chamber immediately, the material could warp.
Open your air valve, insert your pump hose, and start pumping.
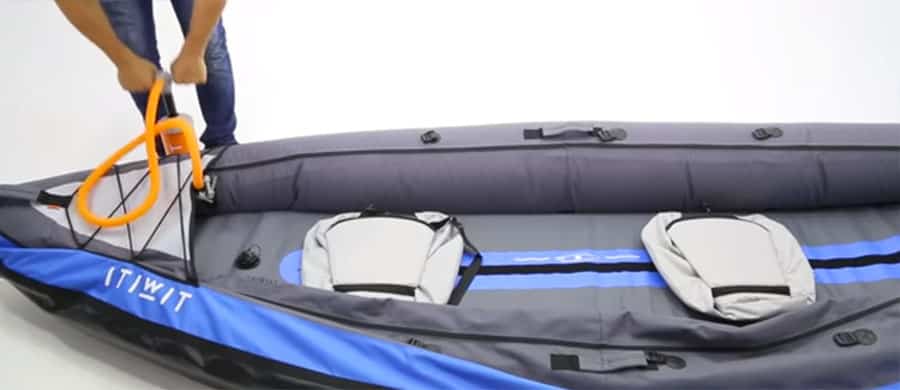
If you’ve been using a kayak for a while, you may find that everything sets is place nicely, and you can just inflate each wall to 100%.
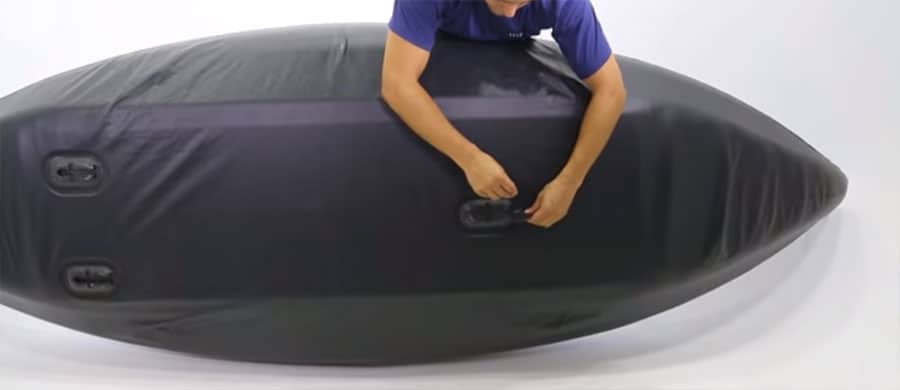
Check the positioning of the floor chamber
After you partially fill each wall, you want to quickly check whether the floor stayed center.
You may need to move the walls slightly to make sure everything is aligned properly.
Fill each wall to 100%
Now continue filling each wall to 100%, full inflation. If you are using a weaker electric pump, you may need to top off to achieve the proper air pressure.
After you are at full inflation, you can close your air valves.
TIP: It is a good idea to double check that all of your air valves are closed tightly. I’ve been distracted by my kids and left them half open several times, so it’s just a good precaution to do so.
Inflate seats
If you have seats that require inflation and positioning, this is when you would do it.
The type of seat you have will vary by boat, as does the method of fixing it in place. Please have a look at your instruction manual to find out how you position your seat in your kayak.
Inserting the skeg
If your kayak has a skeg (or skegs), this is when you would insert them. If you want, you can do this on the water as well, so you don’t damage the skeg (or the boat) accidentally by laying it on the inserted skeg.
What is the recommended air pressure for inflatable kayaks?
The recommended air pressure for inflatable kayak walls is between 1.5 – 2.5 PSI. This varies by kayak, so make sure you check the instruction manual for your specific model.
The recommended pressure for inflatable kayak floors varies widely. If you have a simple air floor, it will be the same as the walls, around 1.5 – 2.5 PSI. If you have a dropped stitched air floor, the recommended pressure may be as high as 15 PSI. Again, make sure you check your instruction manual or Google it.
Pumps and Valves
For you to inflate your rafts, kayak, or boats, you will first need an air pump. Keep in mind that the different kayaks may have different kinds of valves so you will have to make sure that you use the correct valve adapter. Refer to the manufacturer instructions that is provided for the type of valve your kayak has.
The type of pump (or pumps) that you choose will mostly depend on your time, personal preference, as well as the location.
There are 3 types of pumps:
Foot pumps
The foot pump helps you inflate your kayak without having to bend your back over and if your foot tires, you can easily switch to your other foot to get quick relief.
However, the foot pump has some disadvantages. The disadvantages of using a foot pump are that it can become jammed with sand, it can be worn out when it has been used for a long time. Also, it can be damaged when excessive force is applied to it.
All in all, the foot pump is a reliable device that you can use to inflate your kayak in 5 to 8 minutes depending on your pumping rate.
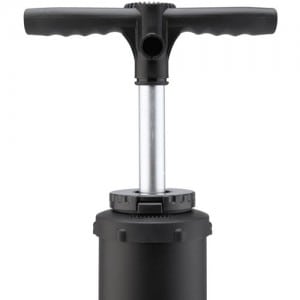
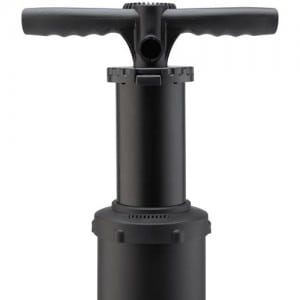
Hand pumps
Unlike the foot pump, you will need to bend your back or kneel over to pump your kayak. This means that it can be pretty tiring to inflate your kayak using a hand pump. Keep in mind that certain hand pumps have a high-pressure mode and a high volume mode. You’ll want to use the correct setting.
Again, you can expect to fully inflate your kayak in approximately 5 to 8 minutes depending on your pumping rate.
Electric air pumps
The easiest and fastest way to get your kayak to be fully inflated is by pumping the air into your kayak by using an electric pump. The electric pump needs minimal effort from you and can fully inflate your kayak within 2 minutes. By using the electric pump, you will only need to set up the kayak but it doesn’t need any pumping action from you. The motor of the pump will do the hard work for you.
However, there are also some disadvantages when using an electric pump. One is that the electric pump may not be highly portable. Apart from that, the electric pump will also need to be powered with electricity. You can use a cigarette lighter, your car battery, an electrical outlet, etc.
Recommended air pumps
Here are the best electric and manual air pumps I have experience with.
With that said, I do not think you need an electric pump for an inflatable kayak, a good hand pump will do. Kayaks don’t need that much air, so save your money.
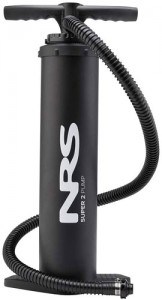
My #1 choice in handpumps is the NRS Super Pump 2, I wrote more about it here.
It’s also a good idea to have a small hand pump in your boat on the water for safety reasons.
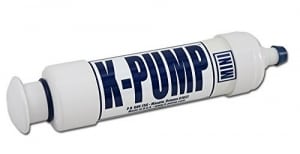
After years of going through several models, I can only recommend the hand pumps by K-Pump. I have a K-Pump 220 HP (which is a 2 stage pump), and also a K-Pump Mini. I keep the Mini in my inflatable kayak and boat all the time.
If you’re going on a longer trip, you absolutely need a high-quality hand pump. Cheap pumps are not dependable. I have had 2 break in my hands.
TIP: You should always have a manual pump handy, in case you don’t have access to an electrical outlet to inflate your kayak with an electric pump or you need to top off your tubes.
How long does it take to inflate a kayak?
Inflating a kayak is easy and only takes a few minutes. It will take 5 – 8 minutes with a manual pump, and about 2 minutes with an electric pump.
After you inflate your kayak a few times, you’ll get faster and more efficient at it.
Here is a charming video that shows you it takes you about as much time as it does to prepare a cup of tea (though this AdvancedFrame kayak only has 4 chambers).