Before going on the water, it is important to check and inspect your inflatable boat to guarantee that there are no leakages, punctures, or damage that may result in mishaps during your boating trip.
However, accidents do happen:
- You drop your utility knife while fishing.
- Your dog’s claws puncture the boat.
- A shark takes a bit out of your boat.
Anything is possible. Except for the last one 🙂
Punctures and leaks can be very alarming away from shore, but thankfully they rarely happen.
Nevertheless, it’s good to have a little knowledge about how to keep the inflatable boat afloat whilst heading towards safety.
Contents
What to do if inflatable boat is leaking air while out on the water?
In the event that your inflatable boat accidentally sustains a puncture or a tear, the first thing to keep in mind is to keep your calm.
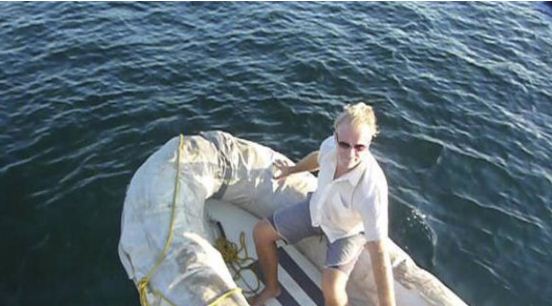
It’s unlikely that you will rapidly sink to the depths of the water even if the dinghy is leaking air, so do not panic.
Inflatable boats are constructed with several separated chambers. If one gets pierced and leaks air, the other chambers will compensate to keep the entire boat afloat.
Nevertheless, it is a good idea to check the severity of the damage and act accordingly.
What To Bring Onboard
While it’s important to know what to do during an emergency, one should also remember to be well-equipped for it, especially if you are further away from safety.
Knowledge alone cannot help you survive this ordeal: it’s best to carry tools and devices onboard to help you address the situation at hand. Here is a checklist of what to bring onboard, just in case…
- Personal Flotation Device (PFD) for each passenger
- Marine emergency radio
- Hand pump
- Duct Tape
- Bottle of Acetone
- Spray bottle with a soapy solution – optional
Look for the Leak
The first step is to try to locate the problem area. Emergency repairs will highly depend on the degree, number, and location of the puncture, so it is important to inspect the damage thoroughly.
If you’re lucky, the leaking chamber will be obvious enough to narrow in on the location of the leak; however, leaks can be hard to spot in some cases. That’s why it would be handy to carry at least a spray bottle of soapy solution with you onboard. This can save you a lot of time in locating the leak.
It works by simply spraying the soapy solution on a suspected area. If bubbles form, that is where the leak is coming from.
Here is a detailed guide on finding and fixing leaks in your SIB.
Leaks in an Accessible Location
If the leak is conveniently situated in an accessible location, you can apply a temporary fix with duct tape to seal it.
- To do so, clean the surrounding area of the puncture using acetone.
- Then, seal the puncture by covering it with duct tape.
- Afterward, fill the chamber in with air using a hand pump and head back to the safety of the shore.
This is the ideal situation.
Leaks that cannot be located
In instances where you cannot find the leak no matter where you look, or if it’s an underwater leak, there is not much you can do in terms of repair.
Pump air into the chambers to slow down the boat’s deflation, and quickly head to shore.
Pump air
 Regardless if you were able to locate the leak or not, it’s important to fill the chambers with air using a hand pump.
If you were able to implement a quick fix, you should pump enough air to bring the boat to a decent level of inflation. However, be cautious not to overinflate the boat, since it may worsen the situation.
If you weren’t able to perform a temporary fix, you will need to continuously pump air into the inflatable boat. Yes, the remaining inflated chambers will keep the boat afloat, but the aim is to slow down the deflation of the boat due to air leakage. This is important especially if you are relatively far from shore.
Head to safety
The steps above only serve as contingency measures to ensure that you will be able to reach the goal – which is getting to safety. This may be the shore or another boat nearby.
As you execute the tips and steps above, make sure that you are moving rapidly towards safety. Temporary repairs and pumping air can only buy you so much time.
Proper repairs and patchwork will have to wait until you reach dry land.
What to do if water is slowly leaking into an inflatable boat?
Aside from leaking air, there are also instances where water slowly leaks into your inflatable boat. This, in itself, is also very problematic especially when you’re out on the water, far from shore.
If this happens, it is needless to say that you should keep your calm. Panicking will only hinder you from appropriately executing the proper measures to fix the situation.
Start by bailing out the water from your SIB.
If water is leaking into your inflatable boat, the most likely cause is its one-way drain valve.
Improperly inserted drain plug
In cases of a drain plug not fully inserted, there’s no need to worry. You will only have to press on the plug to make sure that it’s all the way in.
However, do check for any obstructions that might be hindering it to be properly inserted before you put it back.
Loosely Fitted Drain Plug
Now, this is a more pressing concern. Repairs on loosely fitted drain plugs are best done on dry land.
However, if you have a screwdriver onboard, you can tighten the screws temporarily. Just be careful not to damage or crack the plastic housing.
Upon reaching dry land, you can inspect if the drain plug simply needs added sealant application or if it needs replacing.
Terrific writeup! I’m printing this and putting it into our boat’s log/procedure book…