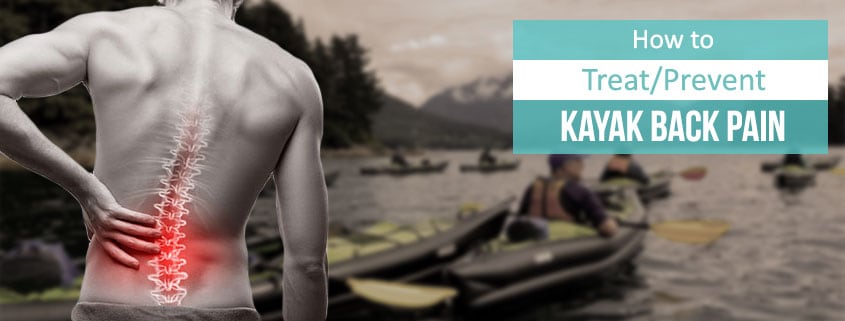
Kayaking is a fun form of exercise, where you get to explore nature. However, if you are not careful, you will get “yak back” and curse at your kayak for days. Or even weeks.
I have mild lumbar scoliosis (curvature of the spine), so I’ve had my share of back pain. You could say, I’ve been there, done that.
This post will explore what causes kayaking back pain, how to avoid it, and how to make it better if you already have yak back.
Contents
What Causes Kayaking Back Pain?
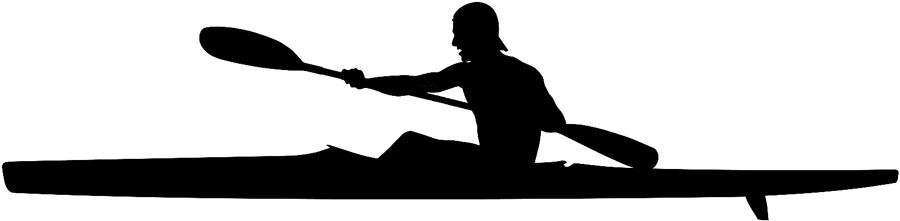
The main culprit for back pain after kayaking is the traditional “L” paddling position.
A combination of two things causes the problem in the L kayaking position:
- Sitting in a non-ergonomic position: The weight of your torso exerts vertical pressure on your lower vertebrae. At the same time, your legs (the most powerful muscles in your body) press against a foot brace and exert horizontal pressure on your lower spine.
- Not shifting position: You are stuck in a tiny seat for a long time without changing positions to release the tension in your legs/back and to stretch.
You might be thinking, don’t the foot pegs and back support help you avoid problems from improper posture?
While they might provide you with proper support and allow you to remain in place, they also have certain limitations:
- Restrict your movement
- Result in excessive pressure on your lower back
Make your legs numb
Combining all of the above can easily result in lower back pain, affectionately termed “yak back”.
8 ways to treat and prevent kayaking back pain
Over the years, I’ve found several ways to deal with back pain during & after kayaking. Doing these exercises and stretches regularly will even help you avoid any pain.
Here’s are 9 of the most effective ways to alleviate paddler’s back.
Maintain proper posture to protect your lower back
Kayak seats provide direct back support, but they do not help you maintain proper posture for long. Time and again, you will be slouching or leaning in one direction.
You have to be self-conscious and try to maintain proper upper body posture and perfect stroke throughout the trip.
Proper posture helps avoid excessive pressure on your back.
Use good paddling technique
The best way to paddle is to treat the kayak as an extension of your body. Rather than using your arms and shoulders to paddle, you have to use your entire body, emphasizing your torso and legs.
Paddling properly and having good posture keeps your entire body moving, disperses pressure from your back and legs, and helps avoid pain after kayaking.
In a nutshell, the proper way to paddle is:
- Leaning slightly forward from the hips, sit tall with your spine long and head high.
- Keeping your arms as straight as possible, hold the paddle out in front of you.
- Drop the paddle blade into the water as perpendicular to the water as possible, and pull back on it. The pulling motion should happen by twisting your torso and using your legs for support. Your arms should remain relatively straight throughout the motion.
- Pull back until the paddle blade is level with your hips.
- Lift the paddle from the water, drop the opposite side into the water, and repeat the motion there.
Stretch before you get into your kayak
Stretching is one of the most important things you can do to help with back pain.
Just 5-6 minutes of targeted stretching will help warm up your muscles and get them ready for the repetitive motion of paddling. Hold each position for at least 15 seconds.
Warning: As with any sport or physical activity, you should get your physician’s approval before trying these stretches. Enter each stretch slowly and gradually. If you feel pain with a stretch, stop.
Here are effective stretches targeting the nerves and muscles you use during kayaking.
Sciatic nerve stretches and gliding
The sciatic nerve is a large nerve that runs from your hip joint down to your lower limb. If you slump in your kayak with your feet supported against a foot brace, you are placing excess tension on the sciatic nerves in both of your legs.
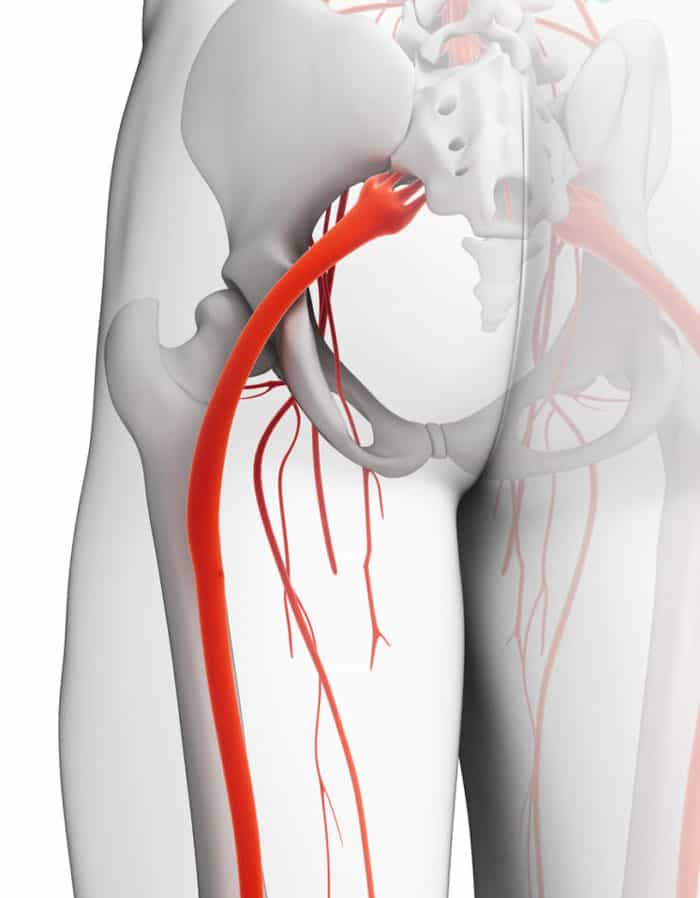
This nerve is the root of a widespread kayaking problem called sciatica, which causes the sensation of numbness and pins & needles in your legs.
Stretching and nerve gliding are effective in improving the mobility of your sciatic nerves.
Here are some exercises which help in easing your sciatic nerve.
Knees to chest
This exercise involves lying flat on your back on the ground.
- Your knees should be bent, and the soles of your feet should be on the ground.
- Slowly lift your bent legs so that your thighs touch your chest and you can wrap your arms around them.
- Lengthen the back of your neck by tucking in your chin.
- Hold this pose for at least 30 seconds, up to 1 minute.
- Return to the starting position slowly, and repeat 2 or 3 times.
Standing hamstring stretch
To carry out this stretch, you need a ledge or table in front of you that is just under your hips’ height.
- Stand straight.
- Lift one of your legs straight out in front of you, resting the heel on whatever you’re using.
- Keeping your spine straight, bend forward at the waist onto your straight leg until you feel the stretch in the back of your leg.
- Repeat with the other leg.
Sciatic nerve gliding exercises
Sciatic nerve gliding is also called nerve flossing.
These exercises do not stretch the sciatic nerve at all. They slide it back and forth, encouraging normal neurodynamics.
The net effect is a loosening of protective muscle tone that restricts movement of the nerve.
Quadratus Lumborum (QL) stretches
The QL is a paired muscle located on the left and right sides of the posterior abdominal wall, deep in the back of your waist on both sides of your lower spine (lumbar vertebrae).
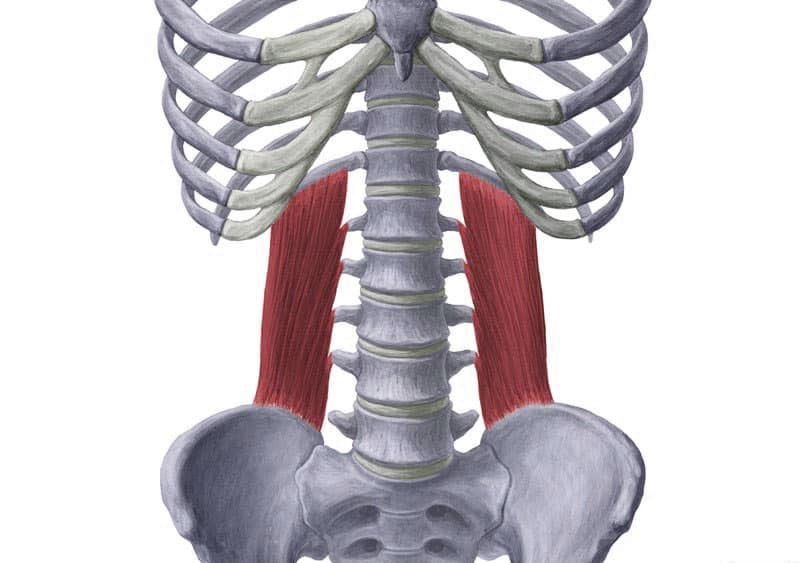
As you paddle, you raise and lower your hips to control your kayak, which can overwork the QL muscle. This may cause lower back pain.
If this muscle is too short, it can result in excessive pressure on your spine as well.
You can find many QL stretches on this page at Healthline, but I’ve found the following 3 to work best for me.
Knee rolls
I first started doing this stretch in yoga class 15 years ago. It is very beneficial and feels great, not just for kayaking.
- Lay on your back, spread your arms straight out to the side with your palms facing down.
- Bend your knees so your soles are flat on the ground.
- Slowly tilt your legs down towards the ground in one direction while turning your head the other way.
- Relax into the pose for a moment.
- Slowly return to the starting position, and repeat the stretch in the other direction.
- Repeat this 8 times in both directions.
Child’s pose stretch
- Lower down onto your hands and knees.
- Bring your hips back in the direction of your heels as far as you can. You may even be able to sit on your heels.
- With your palms on the floor, stretch your arms out forward as far as possible.
- Hold this pose for 15 seconds.
- Walk your hands to the left and move your bumm towards the right. This should stretch your right side.
- Repeat in the other direction.
Side stretch
This is another one from my old yoga class, which the Yogi called leaning palm tree.
- Stand straight, spread your legs shoulder-width apart, and raise your arms above your head. Interlace your fingers.
- From a standing position, raise your arms overhead and interlace your fingers.
- Lean to the left slowly as far as you can, and return to the center position.
- Repeat this in each direction 8-10 times.
Hamstrings stretches
The long muscles in the rear of your upper leg running from between your knee and hip are called hamstrings.
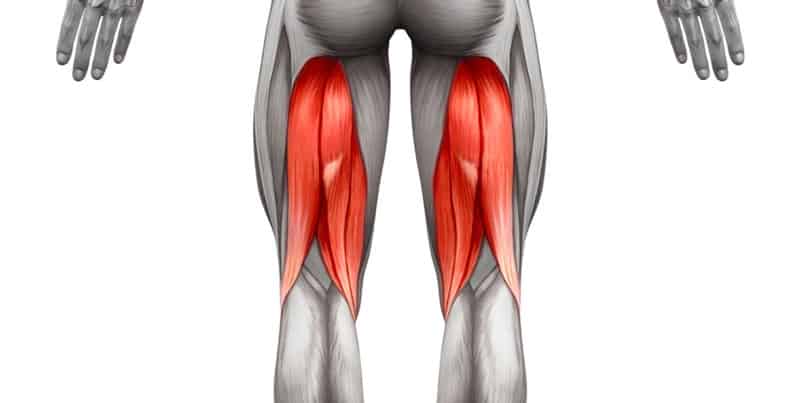
Many people have tight hamstrings. The main goal of stretching your hamstrings is to loosen them.
But you need to be careful.
Folding forward as you did in elementary school might be asking for trouble, as it might cause disc problems. If you’re going to attempt sitting or standing forward folds, make sure you keep your spine straight. Don’t go any further if you need to hump your back.
A better way of stretching your hamstrings is doing so while laying on your back. This method keeps your back straight as an arrow.
You will need a strap or a belt for the following hamstring stretch.
- Lay down straight.
- Place the strap around the ball of one foot and hold each end of the strap with one hand.
- Lift your leg straight up.
- Flex your foot and pull it toward yourself by simply pulling on the strap. You will feel the back of your leg stretching.
- Hold this position while keeping your leg straight.
- Slowly lower your leg to the ground, and repeat with the other leg.
This stretch does it for me, but here are some more if you need them.
Here is a video on what you can do with backpain after kayaking.
Strengthen your core muscles
Many people think paddling comes from the arms and shoulders, but as you now know, correct use of the kayak paddle relies on your torso and legs.
The strength of your midsection (your core) is way more important than your arm strength.
There are many fancy core strengthening exercises you can do, but sticking with an old-school core workout works perfectly. If it’s good enough for Nick Troutman (pro freestyle kayaker), it’s good enough for me.
Here are the things he does.
- Crunches
- Side crunches
- Out-ins
- Butt lifts
- Leg lifts
- Toes touches
- Windshield wipers
- Bicycles
The key, just like with any exercise, is consistency. You need to work on your core several times a week to get results.
Is your paddle long enough?
If your kayak paddle is too short for your height, you probably bang your hands on the edge of your boat and lean sideways with your strokes. No bueno.
Here is a detailed article on how to choose kayak paddles.
Get proper seat cushioning
When you consider that kayaking involves sitting 100% of the time, you will agree that a good kayak seat and proper cushioning are just as important as a good paddle.
This is especially true for hardshell kayaks and high PSI dropstitch-floor inflatables.
Take breaks
Since you cannot switch positions while paddling, get out of the kayak now and then to stretch and walk around.
Stay Hydrated
Kayaking in the sun can cause dehydration if you don’t replenish your fluids.
Staying hydrated also protects the discs in your spine and gives you the energy to keep going and feel good tomorrow.
The recommended daily minimum water intake for men is 3 liters (101 ounces) and 2.2 liters (74 ounces) for women.
But since you’re paddling in the sun all day, you need to increase this minimum level.
Is kayaking bad for your back?
Everybody’s body is different. Kayaking involves sitting and rotation of the spine, which may not agree with some people and cause back issues. If you have previous back injuries or just a bad back in general, you should probably talk with your doctor or physical therapist before you start kayaking.
However, using the proper paddling technique, creating good ergonomics, conditioning your core, and stretching will prevent most injuries. It is a no-impact exercise that uses smooth, controlled movements. Limiting your spinal rotation until your core is strengthened and your stretching routine is in place will help keep your back pain-free.
I have lumbar scoliosis, which can act up at times. I’ve found that the combo of core strengthening exercises and paddling actually makes my back stronger. Of course, I am mindful of all of the ways you can avoid back pain from kayaking (as I listed above).
Lifting a heavy hardshell kayak is more dangerous than paddling. If you have a bad back, getting a lighter inflatable kayak like these helps.
Conclusion
Kayaking is a very beneficial form of exercise:
- It is a no-impact exercise that does not wear on your joints
- It develops cardiovascular fitness
- It increases strength and builds your back, torso, leg, chest, shoulder, and arm muscles
However, kayaking can result in stubborn back pain if you’re not careful.
Take care of your body! The exercises and stretches in this article can help avoid or even overcome yak back, so you can enjoy the kayaking experience rather than worrying about back pain.