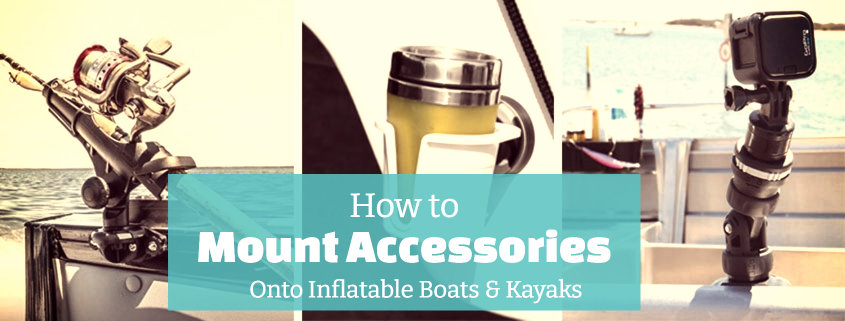
We all love inflatable watercraft for their versatility and ease of transport, but attaching accessory holders is definitely easier on traditional fiberglass boats.
Or at least that’s what you would think!
Let me show you how simple it is to mount attachments to your inflatable boat, kayak, or even SUP.
You can then use them to mount cup holders, bimini tops, fishing rod holders, fishfinder mounts, wrap-around rope holders, etc.
Contents
Inflatable Boat/Kayak Mounting Systems
There are a few brands that specialize in making complete mounting systems.
Each has a base, which has to be attached to your boat. Once there, you can mount a huge number of accessories onto the base, and swap them as you like.
Railblaza mounting system
The base of the Railblaza system is the Railblaza Ribport. It is a 4.5″ x 6″ pad that can be installed onto any surface with the included 3M adhesive.
It’s great because you don’t need to buy glue separately; just peel off the 3M pad and stick it onto your inflatable vessel, regardless of whether it is Hypalon, PVC, or polyethylene. You’ll be able to attach any Railblaza accessory with ease.
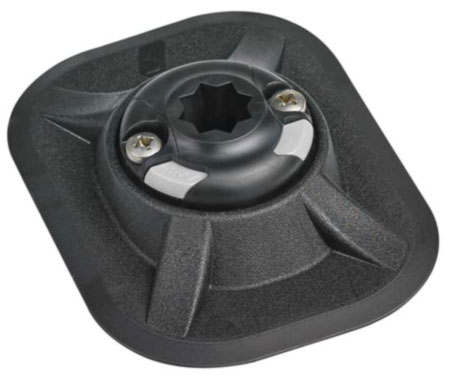
The Ribport retails for around $35 on Yakgear here.
Scotty mounts
The heart of the Scotty mount system is the 5″ x 7″ Scotty #341 glue-on pad. It is made of flexible PVC and can be bonded to Hypalon or PVC.
This Scotty base pad needs to be glued onto your boat, I’ll explain how to do that later in the article. Once installed, all Scotty mount accessories can be attached to the pad. Pretty cool!
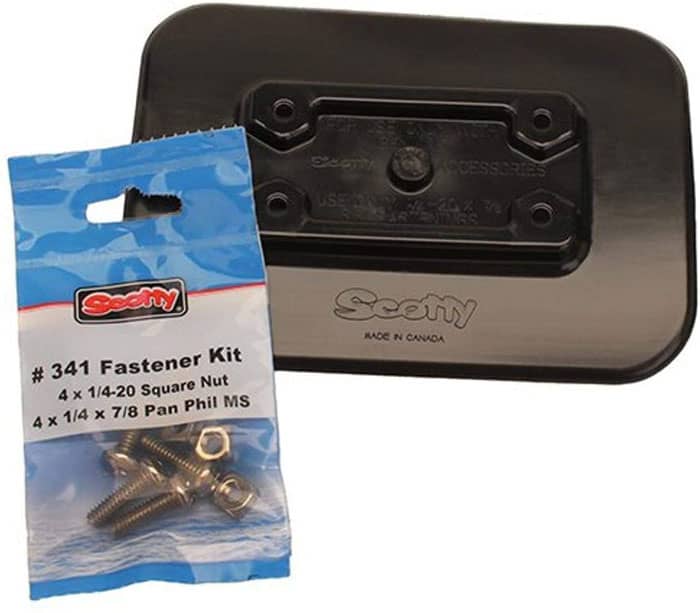
The Scotty mount itself costs around $12 on Amazon here, but you also need a Scotty mounting bracket which holds the accessory mounts.
How to Install a Glue-on Mount Pad on an Inflatable Boat/Kayak/SUP
Mounting accessories onto your inflatable vessel might require gluing. The method is the same for inflatable kayaks, boats, as well as SUPs. Here are step-by-step instructions on how to do so.

Total Time Needed :
1
Day
30
Minutes
Total Cost:
30
USD
Required Tools:
Steps to install a glue-on mount:
Step 1 – Determine position

Determine the position where you want to install the mounting pad. You can choose any spot that has enough room for the pad.
Step 2 – Trace around pad and mask with tape
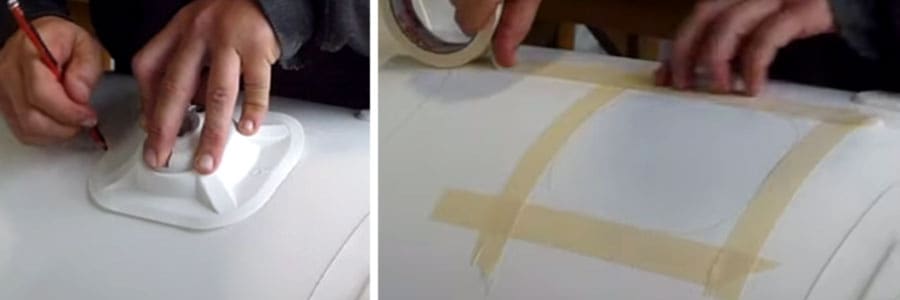
Position the mounting pad on the tube and trace around it using a led-free (!!!) pencil or a marker.
Use masking tape around the area to make sure the glue doesn’t seep anywhere else.
Whether you need to deflate the tube for this depends on the type of pad you are using. Check the instructions of the mounting pad for whether you should inflate or deflate the boat. I’ve only done this inflated.
Step 3 – Clean area
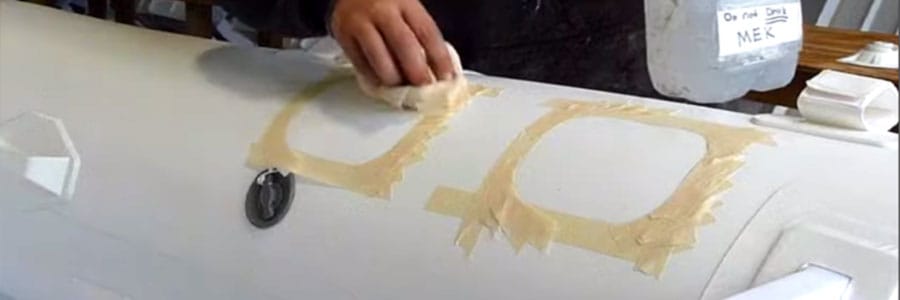
Thoroughly clean the tube and the mounting pad to remove any grease or dirt. Use these cleaners for a stronger bond:
– For PVC, methyl ethyl ketone (MEK) is the best choice.
– For Hypalon, you may want to use toluene.
Step 4 – Gluing
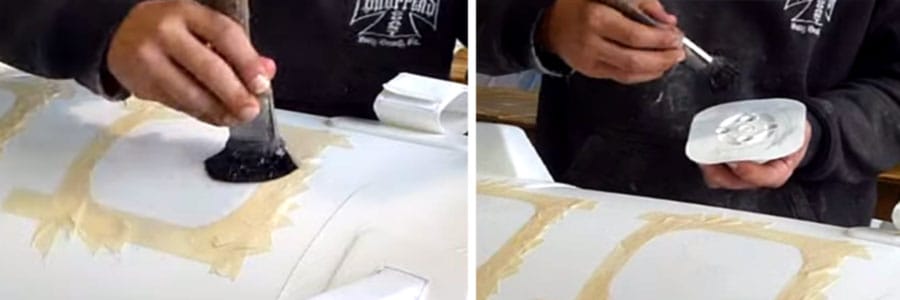
Make sure you are using the right type of glue!
PVC boats:
If you have a PVC boat, use the HH-66 vinyl cement (Amazon link). Apply 2 thin, even layers of this glue to the boat and the patch waiting around 5 minutes between coats.
Hypalon boats:
In the off chance that you have a Hypalon boat, use the Clifton Hypalon Adhesive with some NRS Hypalon Accelerator mixed in (to increase the strength of the bond and speed up the glue’s curing time). Apply three coats of this Hypalon glue mixture to both the boat and the patch. Wait for 10 to 30 minutes in between each coat.
Step 5 – Remove masking tape

After the glue is dry to the touch, remove the masking tape. You don’t want it to get stuck underneath the pad.
Step 6 – Heat gun
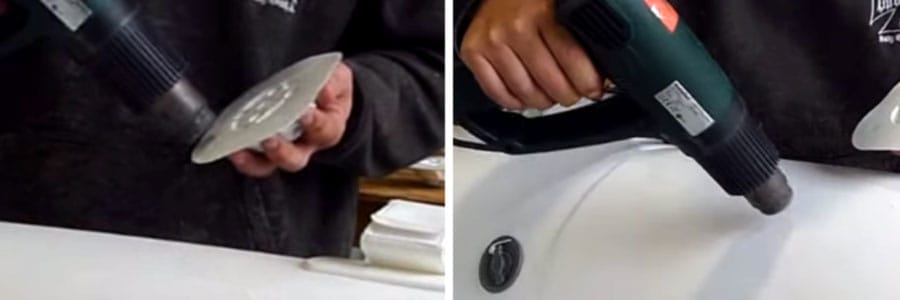
Lightly go over the glued area on the boat and the pad with a heat gun on the ‘low’ setting.
Make sure you don’t overheat!
You just want to dry the glue completely and give a bit of flexibility to the bottom of the mounting pad.
Step 7 – Place the mount onto the tube

Position the mount onto the glued area. Remember that once it is in place, the mount cannot be adjusted or removed!
Rub and press it down thoroughly to ensure all surfaces have adhered properly.
Use a blunt spatula to go over the edges of the mounting pad, making sure the pad is in full contact with the boat.

Here is a great video ffrom Railblaza demonstrating how to glue a mounting pad onto your inflatable boat.
Now that you know how to install a mounting plate, here comes the fun part; browsing through all of the things you can pimp your boat with!
Have a look at all of the accessories you can mount onto your SIB, RIB, inflatable kayak, or even SUP.
Fishing Rod Holders for Inflatable Boats/Kayaks
If you are a fisherman who uses an inflatable fishing boat or kayak, having several fishing rod holders on your boat is very useful. Most purpose-built inflatable fishing boats have them, but in case yours doesn’t (or you need more), you can use a mounting system to attach as many rod holders as you like.
Railblaza Rod Holder II
The Railblaza Rod Holder is 360° adjustable and has a rotating collar to lock your rod in, but still allow easy access to the reel.
Scotty Rod Holders
Scotty has a plethora of rod holders, have a look at them on Amazon here. The Scotty Powerlock 230 is their most popular one.

Cup Holders for Inflatable Boats/Kayaks
Having a cup holder in your boat on longer trips is a blessing. You can reach it easily, and don’t have to worry about spills.
Of course, you can use the cup holder to hold anything that fits into it, like your phone, fish bait, or slingshot if you need to.
Railblaza DrinkHold
The DrinkHold fits Railblaza’s Starport mounting system. It can be mounted vertically or horizontally.
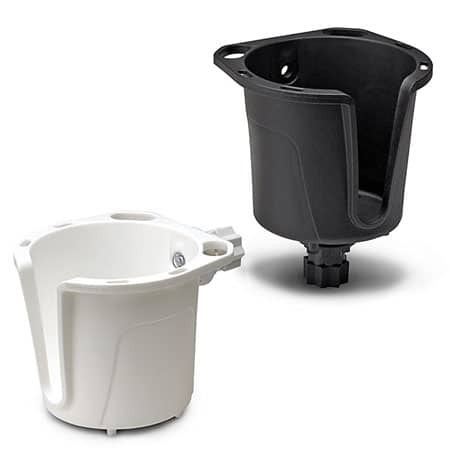
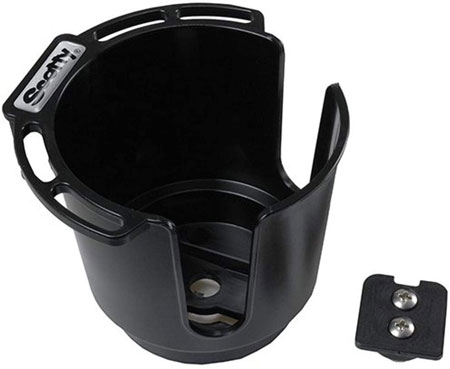
Scotty Drink Holder
This Scotty mount drink holder is compatible with the Scotty base, or the smaller Scotty #442 mount.
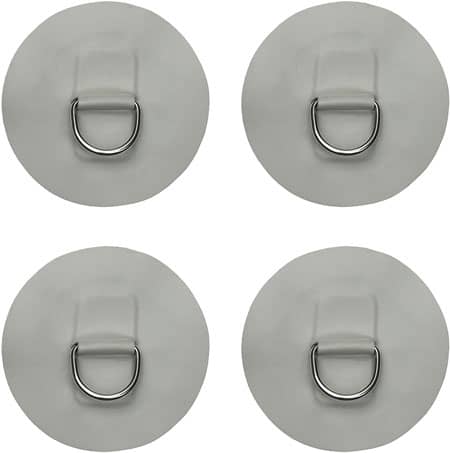
D-Rings for Inflatable Boats/Kayaks
You just can’t have too many D-rings on your boat, right? They are useful for securing your gear, bags, or even a bimini top.
D-rings are not part of mounting systems, you need to glue each one on separately.
Standard D-Rings
This package includes 4 stainless steel, glue-on D-rings, each with a diameter of 11 cm.
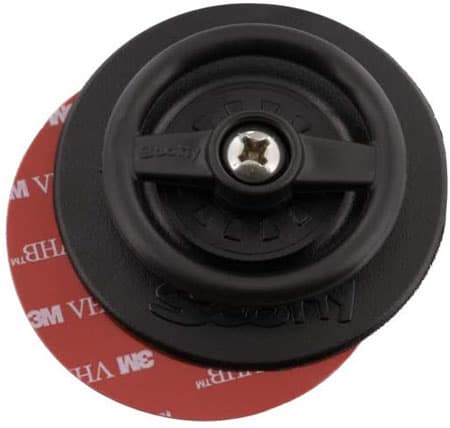
Scotty 443 D-ring
The Scotty D-ring is 8.4 cm in diameter, and includes a 3M stick-on pad for easy installation.
Camera Mounts for Inflatable Boats/Kayaks
If you want to take a GoPro, or any other (preferrably waterproof) camera on your adventure, you’ll need a sturdy camera mount.
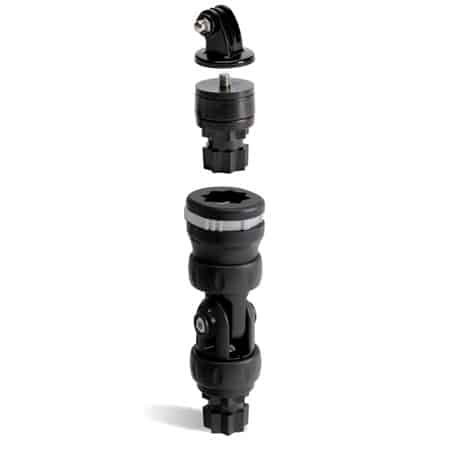
Railblaza Camera Mount
The R-Lock camera mount by Railblaza swivels 360°, can be adjusted single hand, but will still hold your GoPro securely. It has a universal 1/4 20″ screw and a GoPro adaptor.
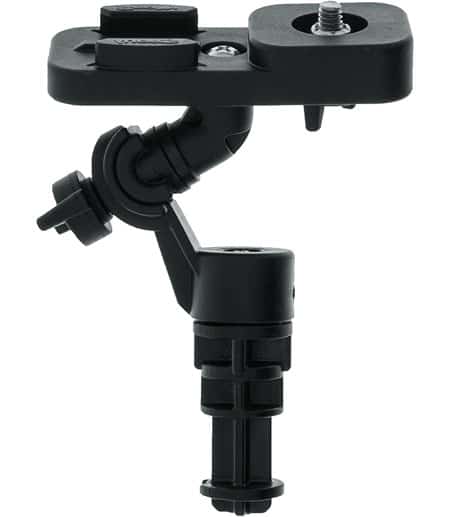
Scotty Camera Mount 135
Scotty’s camera mount will also safely handle standard cameras and GoPros. It rotates full, and like Railblaza, is portable.
Other mountable accessories
You can probably see by now, that using these mounting systems, you can quickly add or swap accessories on your inflatable watercraft as easily as on a fiberglass boat.
Here are a few you might now have thought of.
- navigation lights to comply with nighttime boating requirements
- double or triple rod holders
- camera booms
- hooks
- paddle holders


Tom recently purchased a Sea Eagle 370, and got some rod mounts while waiting for delivery.
As I was reading the manual for the 370 – it had an explicit warning to not glue on rod holders or D rings or other accessories as it will impact the PVC as it flexes as it’s being pumped up or let down.
It’s made me hold off on adding them, how worried should I be?
Well, that recommendation sounds a bit silly, since their own rings are glued on as well 🙂
I really don’t think anything will happen if you glue it on.
However, since it has this warning in the user manual, you will probably lose your 3-year guarantee. I would contact them about this.
I loved this article and it was really helpful. What I would like to know is if this method of gluing would be strong enough to glue on engine mounts so I can attach trolling motor to my inflatable kayak as I do not have the strength to row very far on my own and this would give me the freedom that I desire ?
Hi there, yes, several inflatable rafts use glued bracket buckles to support a trolling motor mount. For example, the Intex Excursion has 4 of them glued on, and you connect their motor mount to those attachments. Here is a close up.
You can buy the attachment in sets of 4, here is one on amazon. Just make sure the motor mount you get is compatible, the Intex motor mount is.