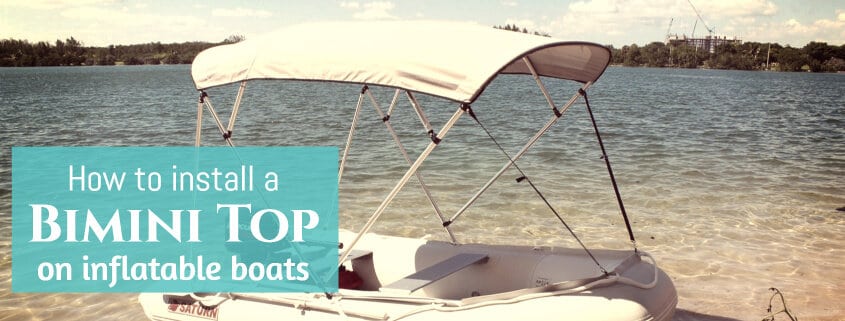
Whether you want to create shade when boating on a hot summer day or you just want to make sure your boat is well protected from the blazing heat of the sun, a bimini top (aka canopy) works wonders.
With all the comfort and convenience it offers, a bimini can, without a doubt, give you a better boating experience.
In this guide to inflatable boat biminis, you’ll learn everything you need to be able to choose, install, and use a bimini on your SIB.
What is a Bimini Top?
A Bimini top is simply a canvas top for a boat, which is supported by a metal frame (usually aluminum).
Most bimini tops can be easily folded back when not in use and be raised again when needed.
What is a Canopy?
Do you know what the difference is between a bimini top and a canopy?
Nothing 🙂 They are synonyms when it comes to boating, and are used interchangeably. The official name is bimini top though, but many people say canopy.
Why Do You Need a Bimini/Canopy for Your Boat?
Have you ever experienced being out on the water for hours under the scorching hot sun? If that is the case, then you probably know why many boaters choose to install a bimini on their inflatable boats.
By having a bimini top:
- Boating becomes more comfortable and therefore more enjoyable.
- You can spend more time out on the water.
- You protect yourself and your passengers from getting dehydrated and burnt by the heat of the sun.
- You protect your boat and your gear from getting damaged by the long exposure to extreme heat.
- And last but not least, you get to pimp out your boat and increase its value.
What to look for when getting a Bimini for your boat?
Now that we established why getting a Bimini top for your boat is a great idea, let’s look into how to choose a bimini for your inflatable boat.
Do you want a Bimini that’s easier and quicker to stow and deploy, or are you looking for the most durable one? It will really depend on your usage and preference.
To help you out, here are some of the things you need to consider when picking a Bimini top:
Bimini Top Fabric
Since the fabric of a Bimini is constantly exposed to the heat of the sun as well as other elements, it is typically the first part to get damaged.
You will want to look for quality marine-grade fabric that can withstand the elements.
Bows
The bows are the number of bars that run through the Bimini top to secure it to the frame.
Bimini tops come with 2, 3 or 4 bows.
The longer you boat, the longer your Bimini should be, so the more bows you’ll need for supporting it. The number of bows is set by the manufacturer when you choose the length of your bimini.
Mounting Frame
Most bimini mounting frames are aluminum, but you can find stainless steel ones as well.
Stainless steel is the best material for a mounting frame when used in saltwater boating. The downside is that steel is heavy.
Aluminum, on the other hand, works best in freshwater boating. If you want to use an aluminum frame in saltwater, just make sure it is treated for saltwater.
Storage Boot
When you fold the Bimini back, it’s good if you can store it safely and neatly in a storage boot, or at least tie it together.
How to measure your boat for the right size Canopy/Bimini top
Bimini tops come in all sizes, so you need to decide how large you want your bimini to be.
One of the first things you need to determine is the area of your boat that you want to shade and cover.
To do this, you need to measure the length, width, and height.
- Measure the length of the area you would like under shade. This isn’t necessarily the entire length of your boat, it should be shorter.
- Measure the width by locating the midpoint of the boat’s side tubes, and measure the distance between them. These midpoints are where we place the main mounts for the Bimini.
- Measure the height of where you want the bimini to be starting from the mounting points (and not from the floor up). Do note that the higher the boat cover is, the less shade you’ll get.
Best Bimini Tops for Inflatable Boats
Here is a list of the best inflatable boat bimini tops (canopies) you can get in 2024.
Seamander Inflatable Boat Bimini Top
This boat cover is made from Marine-grade 600D polyester and has a 1″ anti-rust aluminum frame.
Best of all, it comes with all glue-on mounting hardware you need to install it on an inflatable boat. FYI, it also comes with the hardware you would need to install it on a traditional boat.
It also comes with a 2-year warranty for peace of mind.
This top comes in 3 sizes (length x width x height):
- 150 x 115 x 100 cm (2 bow)
- 165 x 130 x 110 cm (2 bow)
- 180 x 145 x 120 cm (3 bow)
This is my top pick, since it has a good price and includes the mounting hardware.
Sea Eagle Bimini Top
Sea Eagle also makes its own bimini top in 2 sizes. They come with all the hardware you need to install on your inflatable boat.
As with all Sea Eagle products, their bimini tops are top quality as well and have a 3-year warranty. The canopy is made of 322 denier reinforced & UV resistant material, the bows are made of aluminum, and they fold nicely for easy storage.
Here are the sizes (length x width x height), the bigger one is huge, it’ll cover most inflatable boats well:
- 210 cm x 150 cm x 120 cm (83″ x 59″ x 47″)
- 104 cm x 155 cm x 120 cm (41″ x 61″ x 47″)
Naviskin Bimini Top
This Bimini is made from 600D polyester canvas with PU coating, Marine grade. It comes in 13 different sizes and 10 colors.
You need to get the mounting hardware separately with this bimini, as it is not included.
MSC 3 Bimini Top
This Bimini Top has heavy-duty 1″ anti-rust aluminum frame and is made from heavy-duty 600D polyester canvas. It is resistant to fade, mildew, and water.
Again, you need to get the mounting hardware separately.
Mounting Hardware for Installing Biminis on Inflatable Boats
Most bimini tops do NOT come with mounting kits, so you’ll need to check for this.
If your chosen bimini does not include a mounting kit, you can the parts separately. Here are the things you’ll need.
D-Rings
D-Rings: The front and back of the canopy are strapped down onto the boat’s front and back. This keeps the canvas stretched and stable.
If your boat does not have any available eyelets or grommets where you can hook the straps, you can buy D-rings and glue them onto your boat.
Here are D rings on Amazon.
Deck hinges/mounts
2 universal deck hinges/deck mounts: If you choose to install the main bow into your oar locks or handles, you don’t need deck hinges. But if you need to glue them on, Amazon has some.
This purpose-made canopy mount is also a good option and should fit all 1″ frames.
Glue
The mounting hardware needs to be glued onto your boat, so you’ll also need either PVC or Hypalon glue, whichever type of boat you have.
Here are my recommendations:
HH-66 for PVC boats
Most likely, you will have a PVC boat. If this is the case, use the HH-66 vinyl cement (Amazon link).
It creates a strong, yet flexible bond between PVC vinyl.
It is, of course, waterproof as well, and resistant to weather and temperature extremes.
There are loads of videos on YouTube with people showing you how to use it properly.
Clifton Hypalon Adhesive for Hypalon boats
If you have a Hypalon boat, you need to use the Clifton Hypalon Adhesive. It is the best glue for bonding Hypalon to Hypalon.
To make the bond even stronger, you can add the NRS Hypalon Accelerator. You mix it into the base adhesive at a given ratio, and it makes the bond stronger.
How to Install a Mounted Bimini on an Inflatable Boat Using Glue
Every bimini package comes with a guide on how to install the bimini onto inflatable boats, so make sure you follow the instructions.
Here is a general step-by-step guide on how to install a bimini on an inflatable boat using a glue-on mount.
Installation + drying 1 day
Step 1: Determine position
Determine the position where you would prefer to mount the Bimini Top on your inflatable boat. After marking the mounting points, check whether there’s enough open area on the top of each tube to mount the deck mount patch.
Step 2: Trace around patch and mask
Position the deck mount patch on the tube in the proper location. Trace around the patch on both sides of the boat using a pencil or a marker.
I’ve found it’s better to deflate your boat for this step, but some instructions state otherwise.
Add masking tape around the traced area, so your glue won’t go on the boat needlessly.
Step 3: Clean area
Thoroughly clean these areas of the boat to remove any grease or dirt. Clean the underside of patch assemblies also.
For PVC, methyl ethyl ketone (MEK) is the best choice.
For Hypalon, you may want to use toluene.
Using these specific cleaners will result in a stronger bond later when you glue the patches up.
Step 4: Gluing
Make sure you are using the right type of glue as I mentioned before, specifically for PVC or Hypalon.
If you’re gluing Hypalon, you should mix Hypalon accelerator into the glue. It will increase the strength of the bond and speed up the glue’s curing time.
For Hypalon, apply three coats of glue to both the boat and the patch. Wait for 10 to 30 minutes in between each coat.
For PVC boats, apply 2 layers of glue to the boat and the patch waiting around 5 minutes between coats.
Position the deck mount patch assembly onto the glued area. Make sure to align the deck mount parallel with the boat tubes, with the screw head facing outwards.
Remember that once it is in place, the mount cannot be adjusted or removed!
Rub and press the patches down thoroughly to ensure all surfaces have adhered properly.
Allow to dry for 24 hours before inflating your boat.
Step 5: Inflation
Now that the glue has dried, you can inflate your boat.
Step 6: Attach bimini
Position the stern of the top toward the rear of the boat and attach the eye end on the side tubes on each side to the deck mounts.
In attaching the Bimini, make sure that it is securely attached, stretched out, and does not sag.
Don’t worry, the process is not as hard as it seems.
Installing a Bimini on an Inflatable Boat Using the Oar Locks
Another way of installing a Bimini on your boat is by making use of the oarlocks.
The deploying process is the same as above, but you won’t need to glue a mounting patch.
The mounting hardware that comes along with the Bimini top package can be directly installed onto oarlocks. You may have to adjust the size of the end pieces in order to fit over the oarlock pin.
Installing the Bimini Onto Built-In Handles or Simple Oar Holders
Yet another method of installing your canopy is directly into your boat’s handles or the cheaper-style oarlocks like so.
The Sea Eagle bimini comes with the required hardware, but you can easily get them from your friendly neighborhood hardware store if you buy a bimini from a different brand.
The deploying process is the same as above, but you won’t need to glue a mounting patch.
The mounting hardware that comes along with the Bimini top package can be directly installed onto oarlocks. You may have to adjust the size of the end pieces in order to fit over the oarlock pin.
How to Close and Store the Bimini When Not in Use
Another added perk of having a bimini top is its versatility. When you prefer to catch some rays or when you don’t need the shade, you can fold it back and store it securely. It’s fairly easy!
Step 1: Unclip the tie-down straps starting from the front.
Step 2: Fold the top backward while smoothing it to avoid crumpling it.
Step 3: Get the storage boot and zip it around the curve of the Bimini.
Step 4: If your Bimini has a rear brace, you need to unscrew it or release the pin to allow it to lay flat for proper storage.
How Fast Can You Go with a Bimini on a Boat?
If you have a motor powered SIB, you might be wondering how fast you can go before the bimini tears off.
If the canvas is made out of good material and your mounting point is solid, you can pretty much max out even a 20 HP motor without any issues.
Here is a video of a Saturn equipped with a bimini. You can see that a properly installed bimini top does not even budge, despite the high speed of the boat.


